
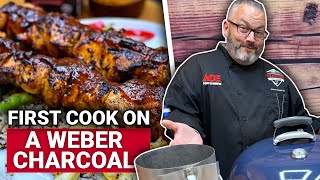
First Cook On A Weber Charcoal Grill
If you’re new to the Weber Charcoal Kettle Grill, then we’ve got just the right tips for you. Get familiar with how this grill works with an easy recipe that shows you all the features. Today’s recipe gives you a chance to see how that kettle works, fine tune those vent adjustments and if something goes wrong… won’t break your wallet.
Ingredients and Supplies
Ingredients
- 1 lb – Chicken Breast (Boneless, Skinless)
- 1 tbsp – Canola/Olive Oil Blend
- 2-4 tbsp – Oink Rub, 5280 Culinary
- ¼ cup – High Altitude BBQ Sauce, 5280 Culinary
Directions
- Clean and sanitize all cutting boards and prep surfaces prior to use
- Read all manufacturer’s instructions before using grills, blenders and any cooking tools
- Clean Weber kettle and chimney before first use – wipe down with damp towel
- Open the bottom vents and top vents to 100% open
- Load chimney with your choice of charcoal briquettes – load fuller for longer grilling times
- Remove top grill grate and place a piece of foil or foil pan on the grate
- Add a Firestarter or tumbleweed, ignite the starter and place the chimney over the starter
- Allow the charcoal to ignite about 90% with some unlit coals at the very top
- Using heat proof gloves, lift the chimney, remove the foil pan and carefully grab the handles of the chimney
- Pour the hot charcoal into the center of the kettle and arrange into an even layer and size
- Place the dome on the kettle and adjust so temp reaches 500˚ F or above
- While grill is heating up – prep chicken skewers as follows
- Cut chicken breast into 2” cubes
- Place into a mixing bowl
- Drizzle with oil, just enough to coat chicken and mix well
- Season to taste with Oink
- Allow to sit for 5-10 minutes to “soak”
- Using the Weber Metal Skewers
- Skewer the chicken pieces being careful not to pack them on
- Place onto a cooking sheet and bring to grill
- Open the grill and carefully add the chicken skewers over the hottest part, watch for any signs of flare ups
- Using a long pair of tongs, rotate the chicken after 3-4 minutes and continue to do this until all sides have been seared. Close the dome after the final side is seared
- Continue to cook with the lid closed and check temp. desired temp is 165˚ F
- Once cooked to your desired doneness, remove from the grill, close all vents and put the lid on
- Bring chicken into the kitchen
- Drizzle with High altitude bbq sauce if desired Or Serve with BBQ dipping sauce and devour
Always follow manufacturer's instructions before using any product.
For more helpful tips and advice, visit a neighborhood Ace or visit us online at acehardware.com
These “How-To’s” are provided for informational purposes only. The information contained in Ace Hardware’s “how-to” videos and/or articles is intended to provide general guidelines for projects in and outside of your home. Tools, products, materials, techniques, building codes, local regulations are continually changing. Ace Hardware assumes no responsibility for the accuracy of the information contained herein and disclaims any liability for the omissions, errors or the outcome of any project. It is the responsibility of the viewer to ensure compliance with all applicable laws, rules, codes and regulations for a project and the product being used. The viewer must always take proper safety precautions and exercise caution when taking on any project or using materials of said project. If you have any questions, concerns, or doubts regarding any element of what is displayed in the videos and/or articles, contact a licensed professional.